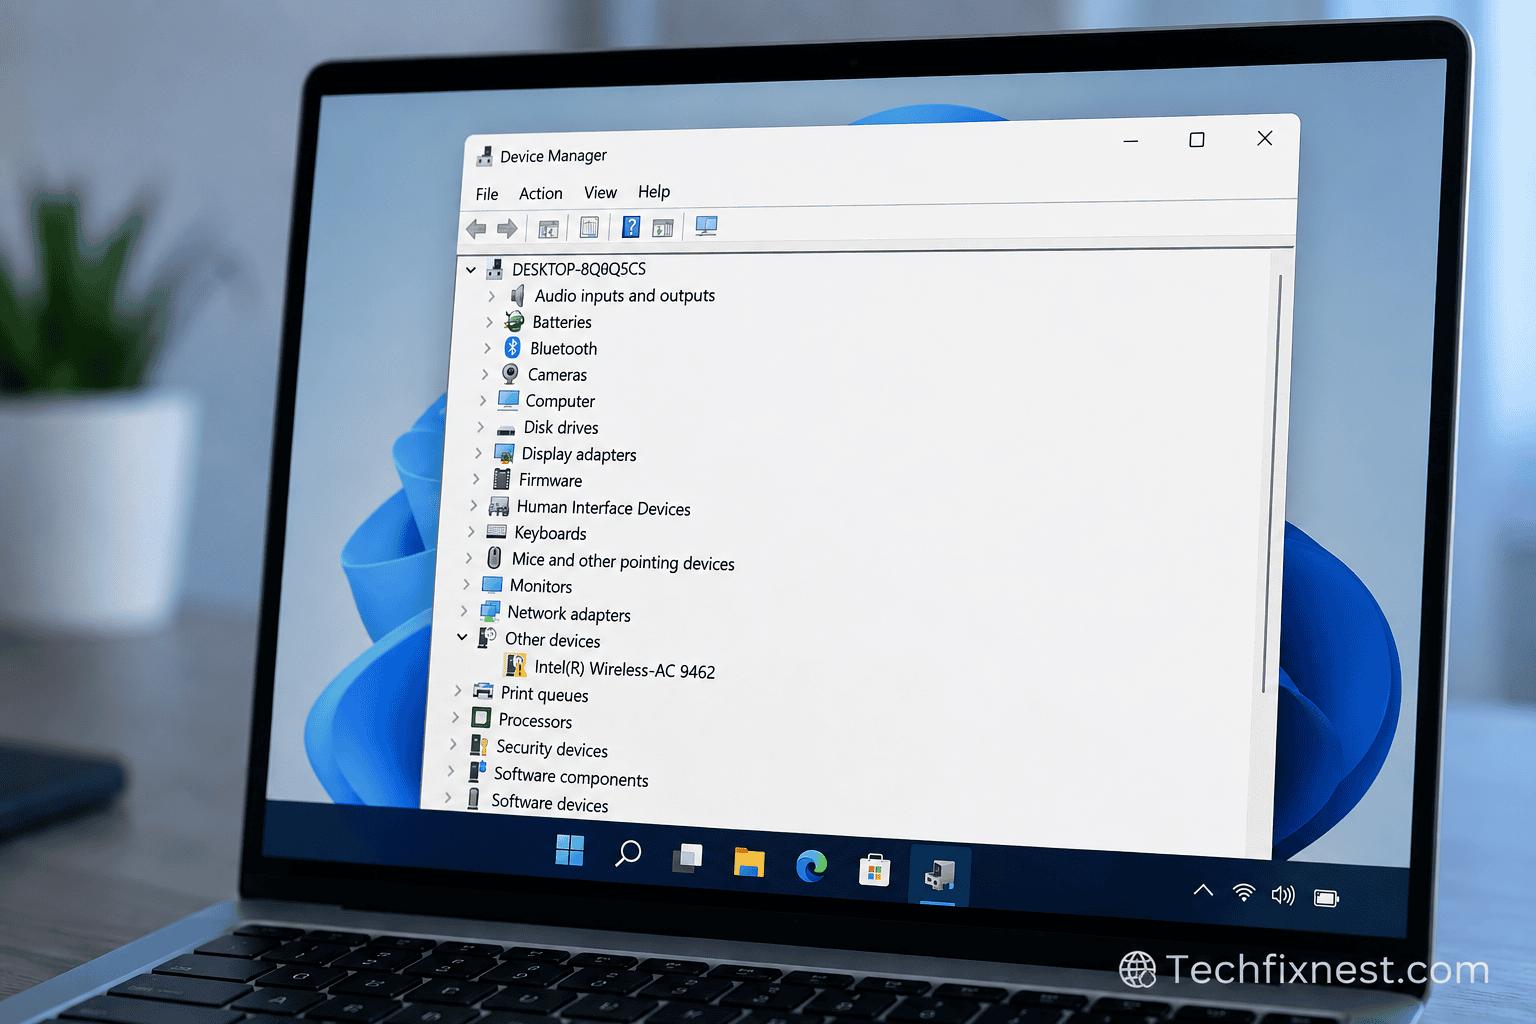
Last week I opened Device Manager to check something completely unrelated, and there it was a small yellow triangle sitting on top of my Intel graphics driver, like it had been quietly warning me for who knows how long. No crash, no blue screen, nothing dramatic. Just that little icon, sitting there, making me nervous about a laptop that otherwise seemed fine.
If you’ve landed here because you spotted the same thing, the good news is this almost never means your hardware is dying. It usually means Windows and your Intel driver had a disagreement over an update, a conflicting install, or a corrupted driver file — and now Device Manager is flagging it so you don’t ignore it. The bad news is the fix depends on which underlying error you’re actually dealing with, so let’s figure that out first.
Quick Answer
If you see a yellow warning icon on an Intel driver in Device Manager, right-click the device and check Properties > General for the exact error code it’s almost always Code 10 (device cannot start) or Code 31 (driver not loaded properly). Once you know the code, the fastest fixes are updating through Windows Update, reinstalling the driver cleanly, or running Intel Driver & Support Assistant (Intel DSA) to pull the correct OEM-matched version. Full steps for each scenario are below.
Why This Is Happening
Device Manager doesn’t just randomly decide to flag a driver. The yellow icon shows up when Windows detects that a device isn’t communicating properly with the operating system, and there are really only a handful of reasons that happens with Intel drivers specifically.
A Windows Update Replaced a Working Driver with a Broken One
This is the most common cause I see. Windows Update sometimes pushes a generic Intel driver over a manufacturer-specific one that was working fine, and the generic version doesn’t fully support your exact chipset or GPU model.
Clue: The warning icon appeared right after a Windows Update install or a forced restart for updates check Settings > Windows Update > Update history to confirm the timing.
The Driver Installation Got Interrupted or Corrupted
If your laptop restarted mid-update, lost power, or you force-closed an installer, the driver files can end up in a half-installed state. Device Manager sees the device but can’t properly load it that’s Code 31 in a nutshell.
Clue: You remember a driver install being interrupted, or the error code in Device Manager specifically reads Code 31.
There’s a Conflict Between Intel’s Driver and a Manufacturer-Customized Version
Laptop makers like Dell, HP, Lenovo, and Asus often ship modified Intel drivers with extra power management or display features baked in. When Intel’s generic driver tries to install over that customized one, they can fight each other for control of the device.
Clue: You recently installed a driver directly from Intel’s website instead of your laptop manufacturer’s support page, on a laptop that came with OEM-customized drivers.
Intel Driver & Support Assistant (DSA) Installed Something Incompatible
DSA is generally reliable, but if it’s out of date itself or misreads your exact hardware revision, it can push a driver build that doesn’t fully match your chipset.
Clue: The warning icon showed up shortly after running Intel DSA and accepting a suggested update.
The Device Is Genuinely Disabled or Hidden from a Previous Troubleshooting Attempt
Sometimes this warning icon is leftover from an old fix — a driver got disabled during a different troubleshooting session and never got re-enabled properly.
Clue: In Device Manager, the device icon has a downward grey arrow instead of a yellow triangle, or “Device status” mentions the device is disabled rather than showing an error code.
None of these point to failing hardware. If your Intel graphics or chipset were actually dying, you’d typically see visual artifacts, system instability, or the device disappearing from Device Manager entirely — not just a warning icon with everything still functioning.
How to Fix It
Work through these in order. Check the error code first — it saves you from trying fixes that don’t apply to your situation.
1. Check the Exact Error Code First
Before doing anything else, find out which specific error you’re dealing with:
- Open Device Manager (right-click Start > Device Manager)
- Expand Display adapters or System devices, depending on which Intel component shows the yellow icon
- Right-click the flagged device > Properties
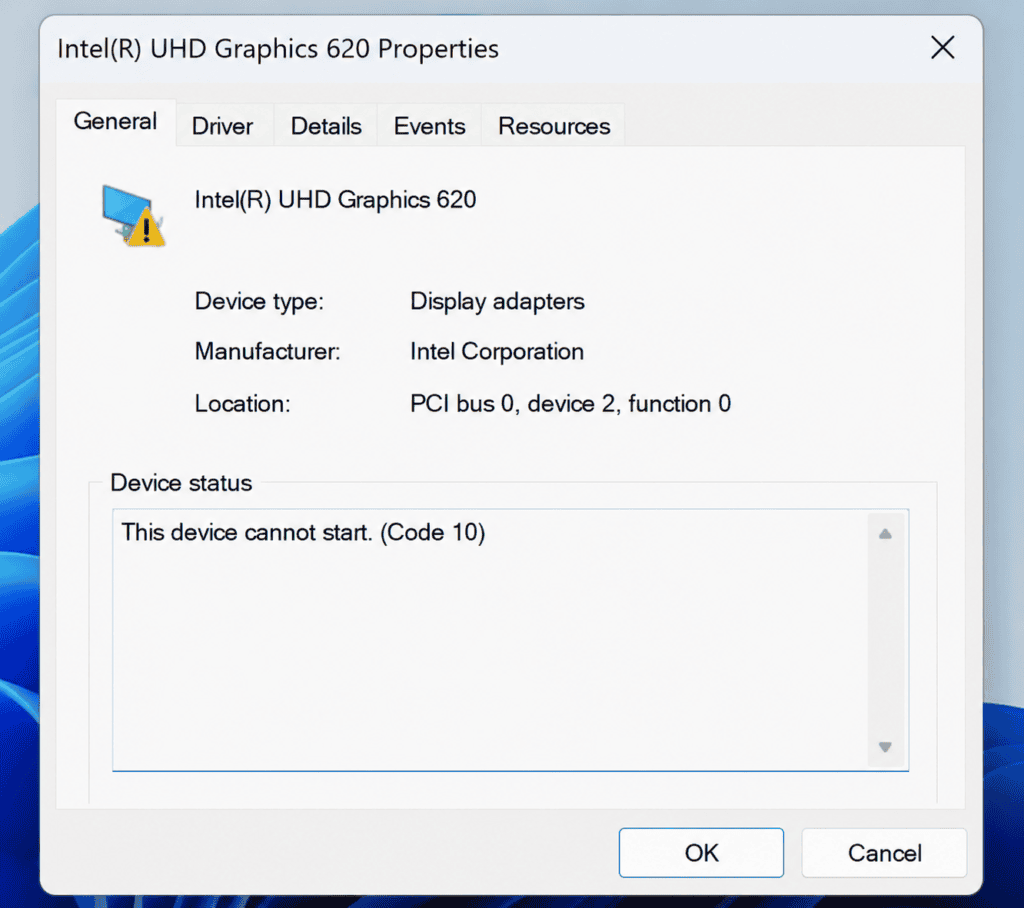
- On the General tab, look under “Device status” for a message like “This device cannot start (Code 10)” or “This device is not working properly because Windows cannot load the drivers required for this device (Code 31)”
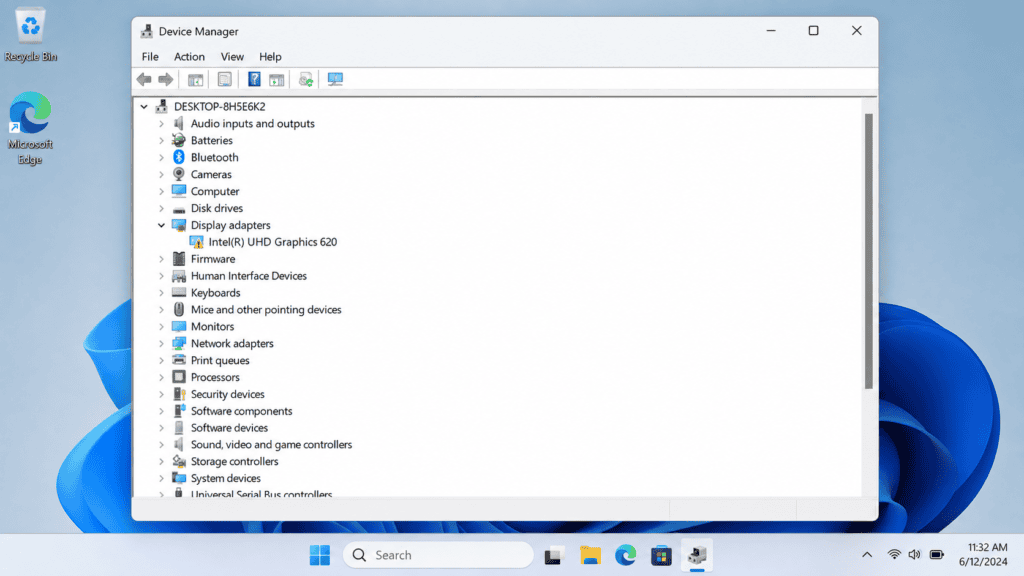
Write down the exact code it tells you which fix path below to follow.
2. Fix Error Code 10 (Device Cannot Start)
Code 10 usually means Windows can see the device but the driver is refusing to initialize it. Try these in sequence:
- In the device’s Properties window, click Driver tab > Update Driver > Search automatically for drivers
- If that finds nothing new, click Roll Back Driver if the button isn’t greyed out this reverts to the previous version, which often resolves Code 10 immediately if a recent update caused it
- If rollback isn’t available, try Uninstall device, check the box for “Attempt to remove the driver for this device” if present, then restart Windows will often reinstall a working generic driver automatically
Test: After restarting, reopen Device Manager and check if the yellow icon is gone and the status reads “This device is working properly.”
3. Fix Error Code 31 (Driver Not Loaded)
Code 31 typically points to a corrupted or incompletely installed driver:
- Right-click the device > Uninstall device
- Check “Attempt to remove the driver for this device” if the option appears, then confirm
- Restart your PC completely (not just sleep)
- Let Windows attempt to reinstall the driver automatically on boot, or manually trigger it via Action > Scan for hardware changes in Device Manager
Test: Check Device Manager again after restart. If the warning persists, move to the manual driver reinstall in the next step.
4. Do a Clean Manual Driver Reinstall
If the codes above didn’t fully resolve it, a clean reinstall using the correct driver source usually does:
- Note your exact device model right-click the flagged device > Properties > Details tab > select “Hardware Ids” from the dropdown to see the precise chipset/GPU identifier
- Uninstall the device again (same steps as above)
- Go to your laptop manufacturer’s support page (Dell, HP, Lenovo, Asus, etc.) and search using your exact model number download the OEM-specific Intel driver package, not the generic Intel.com version, if your device is a laptop
- Run the installer as Administrator, restart when prompted
Test: Confirm in Device Manager that the device now shows no warning icon and status reads normally.
5. Use Intel Driver & Support Assistant (Intel DSA)
Intel DSA is genuinely useful here because it identifies your exact hardware and recommends a matched driver, rather than a generic one:
- Download Intel DSA from Intel’s official support site
- Run it — it scans your system and lists any outdated or problematic Intel drivers
- Apply the recommended update it suggests for the flagged device
- Restart after installation completes
One thing worth knowing: on laptops, DSA sometimes recommends a newer driver than what your manufacturer has validated for your specific model. If DSA’s suggested driver causes new issues, the OEM-specific version from Step 4 is usually the safer long-term choice.
6. Let Windows Update Handle It (Sometimes the Simplest Fix)
Occasionally the fix really is just waiting for Windows Update to catch up with a corrected driver:
- Go to Settings > Windows Update > Advanced options > Optional updates
- Check under “Driver updates” for any pending Intel driver update
- Install it if available, then restart
Test: This won’t always show something new, but it’s worth checking before assuming you need a manual fix.
7. Check for Driver Conflicts From Previous Installs
If you’ve tried multiple drivers already (Intel’s generic version, OEM version, DSA’s suggestion), leftover files from earlier attempts can conflict with each other:
- Download Display Driver Uninstaller (DDU) a free, widely used tool specifically for cleanly removing all traces of graphics drivers
- Boot into Safe Mode
- Run DDU and select the option to fully clean the Intel driver
- Restart normally, then install a single fresh driver from your chosen source (OEM page or Intel DSA pick one, don’t mix)
Test: This is the most thorough option and typically resolves persistent Code 10 or Code 31 errors that survive simpler fixes.
Troubleshooting Table
| Symptom | Likely Cause | Fix |
|---|---|---|
| Code 10, appeared after a Windows Update | Update replaced a working driver with an incompatible one | Roll back driver, or reinstall OEM version |
| Code 31, appeared after interrupted install or shutdown | Corrupted or incomplete driver installation | Uninstall device, restart, let Windows reinstall |
| Warning icon after installing Intel DSA update | DSA driver mismatched with OEM configuration | Reinstall using manufacturer’s OEM driver instead |
| Warning persists after multiple driver installs | Conflicting leftover driver files | Use DDU in Safe Mode for a clean wipe, then reinstall once |
| No error code shown, icon just appeared | Device manually disabled in a past session | Right-click device > Enable device |
| Warning only on integrated graphics, not chipset | Display driver specific issue | Focus fixes on Display adapters entry only |
Pro Tips
- Always check the exact error code before trying fixes Code 10 and Code 31 have different root causes, and guessing wastes time.
- For laptops, prefer your manufacturer’s driver package over Intel’s generic download whenever both exist. OEM versions are tested against your exact hardware configuration.
- Create a restore point before doing a clean driver reinstall if something goes sideways, you can roll back the whole system state, not just the driver.
- If you regularly use Intel DSA, let it manage updates going forward, but always verify a suggested update didn’t just retrigger the same warning after installing.
Common Mistakes to Avoid
- Installing both Intel’s generic driver and DSA’s suggested driver back to back. Pick one source and stick with it mixing driver packages is a common cause of ongoing Code 31 errors.
- Skipping the restart after uninstalling a device. Windows needs a full reboot to properly reinitialize and reinstall the driver; sleep or hibernate won’t trigger this.
- Assuming the yellow icon means hardware failure. In the vast majority of cases, this is a software/driver conflict, not a sign your GPU or chipset is dying.
- Downloading drivers from third-party “driver update” sites. Stick to Intel’s official DSA tool or your laptop manufacturer’s support page third-party driver sites are a common source of malware and mismatched drivers.
FAQ
Not usually. It almost always indicates a driver communication issue, not physical hardware failure. If your display is working normally and you’re not seeing visual artifacts or crashes, the hardware itself is very likely fine.
Yes, a clean reinstall typically resets display settings like resolution scaling, color profiles, and multi-monitor arrangements back to default. You’ll need to reconfigure those afterward, but no personal files are affected.
For laptops, use your manufacturer’s support page whenever possible. They test and validate driver versions specifically for your model, which avoids many of the compatibility issues that come from Intel’s generic driver package.
Yes, Intel Driver & Support Assistant is an official Intel tool and safe to use. It’s genuinely helpful for identifying your exact hardware, though for laptops it’s still worth cross-checking its suggestion against your manufacturer’s recommended driver if issues persist.
What if Code 10 or Code 31 keeps coming back after I fix it?
This usually points to a deeper conflict — either leftover driver files from previous installs or a corrupted Windows driver store. A clean wipe using DDU in Safe Mode, followed by a single fresh driver install, resolves most recurring cases.
If that yellow triangle is still sitting there after working through this list, don’t panic — Intel driver conflicts are genuinely one of the more stubborn Windows quirks, but they’re rarely a sign of anything worse than a mismatched update. Between checking the exact error code, using the right driver source for your device, and doing a clean reinstall when needed, most people find the fix somewhere in this list before reaching the last step.